


Mark-Making with Thread: A Hand Embroidery How-To
A Free Tutorial - Part 2.

In my last post, Easy Wet Felted Brooch: A Free Tutorial, I shared how to create a felt a disc shape to develop into a brooch. This super-easy process makes for a very quick project. In this post, I am sharing how I use hand embroidery as a form of mark-making in my own work on handmade felt, to develop the surface with texture and to ‘draw’ with stitch.
Before we launch into the video tutorial, lets look at the process of design, making marks and creating surface. As an artist, I work extensively in my sketchbooks, which often form the starting point of future work. Sometimes it quite deliberate - I’ll create a sketchbook during a journey or holiday, like the Cornwall pages in the sketchbook I shared in - June Arty News Continued... - and from these pages, new work is born. Colour, textures and surfaces, are recorded through mixed media experiment, and the experience of the places stays with me, alive in my sketchbook. From this, I form connections with themes, colour palettes or shapes and lines in the landscape that become developed pieces of work.
Often, I work unintentionally and later find a common theme emerging. My autumn sketchbook is a good examples of this. I’m inspired by walks I’ve taken, my locality, the season itself, and I find myself making unconscious selections. Colour palettes are really important during this process, and I am drawn to the colours I am seeing in my environment, just as I am with the shapes and lines, silhouettes within the landscape. These elements are then echo and repeat through my sketchbook.


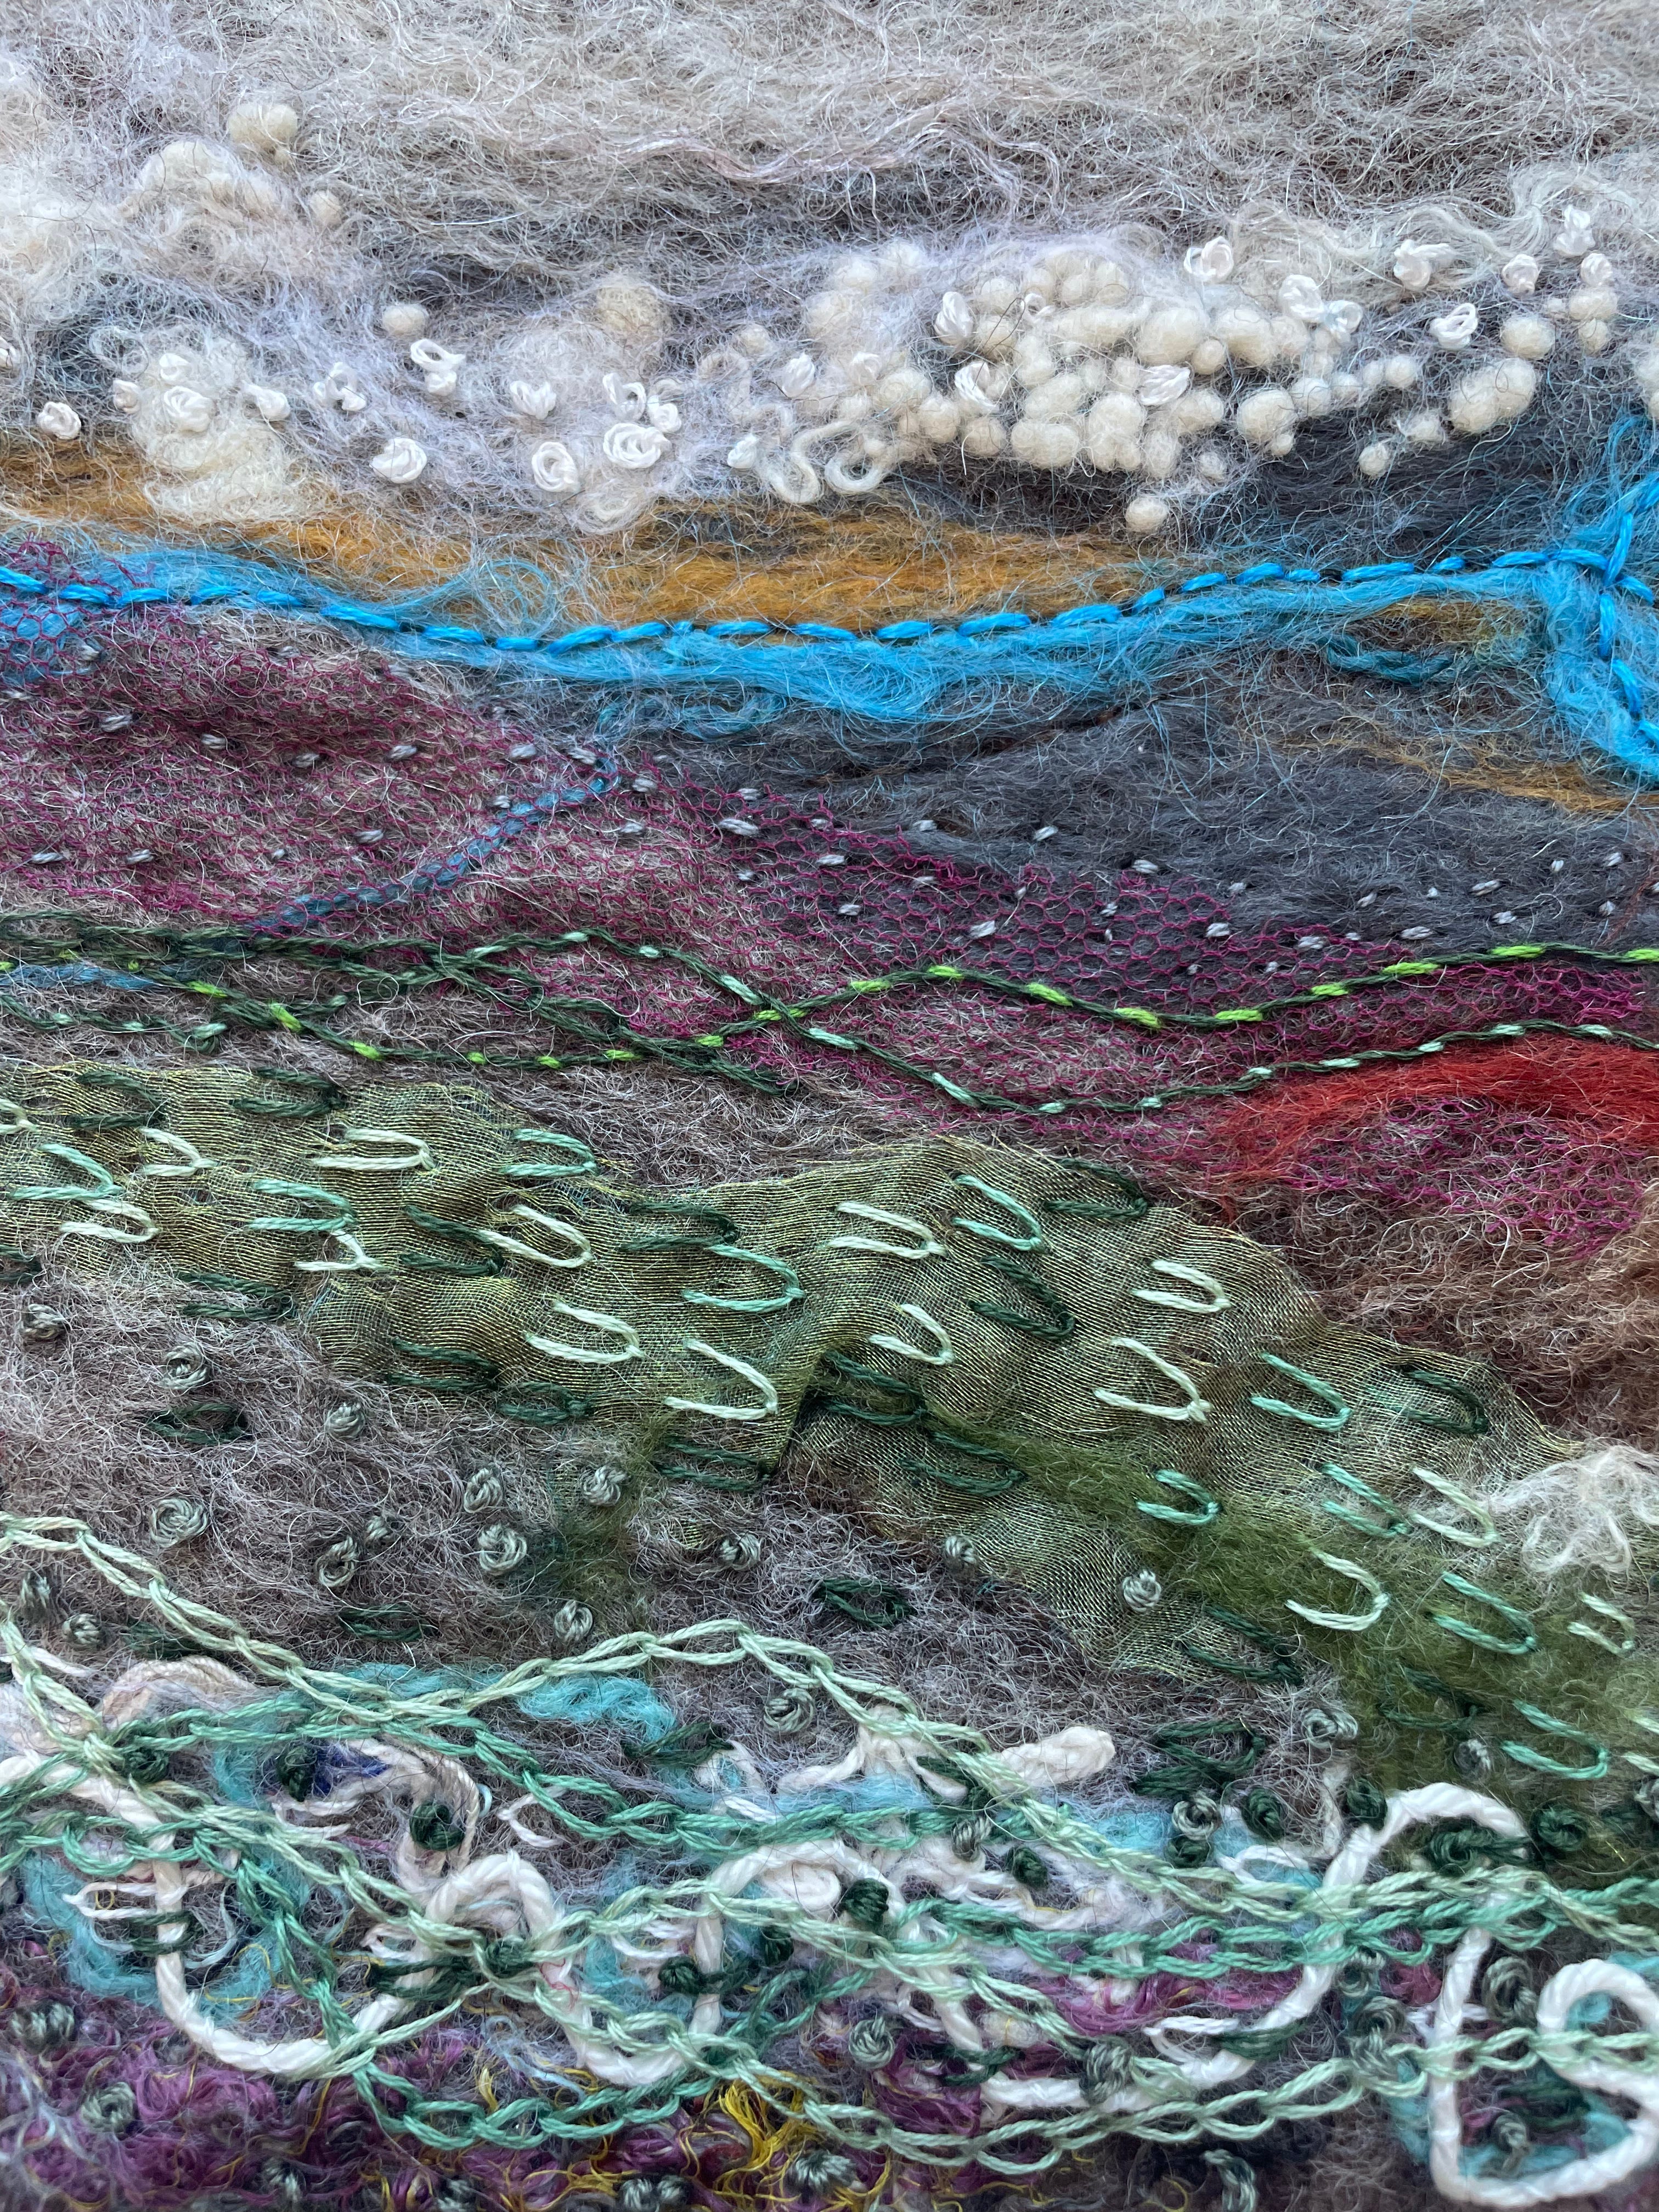
From these pages, ideas for felt works begin to take shape. Texture and composition is build using nuno-felted fabrics - nuno felt being the term for combining an open-weave fabric with fibre. During the wet felting process, the fibres bind onto the fabric, resulting in a beautifully collaged surface. It’s this surface that I then develop further with hand and machine embroidery.
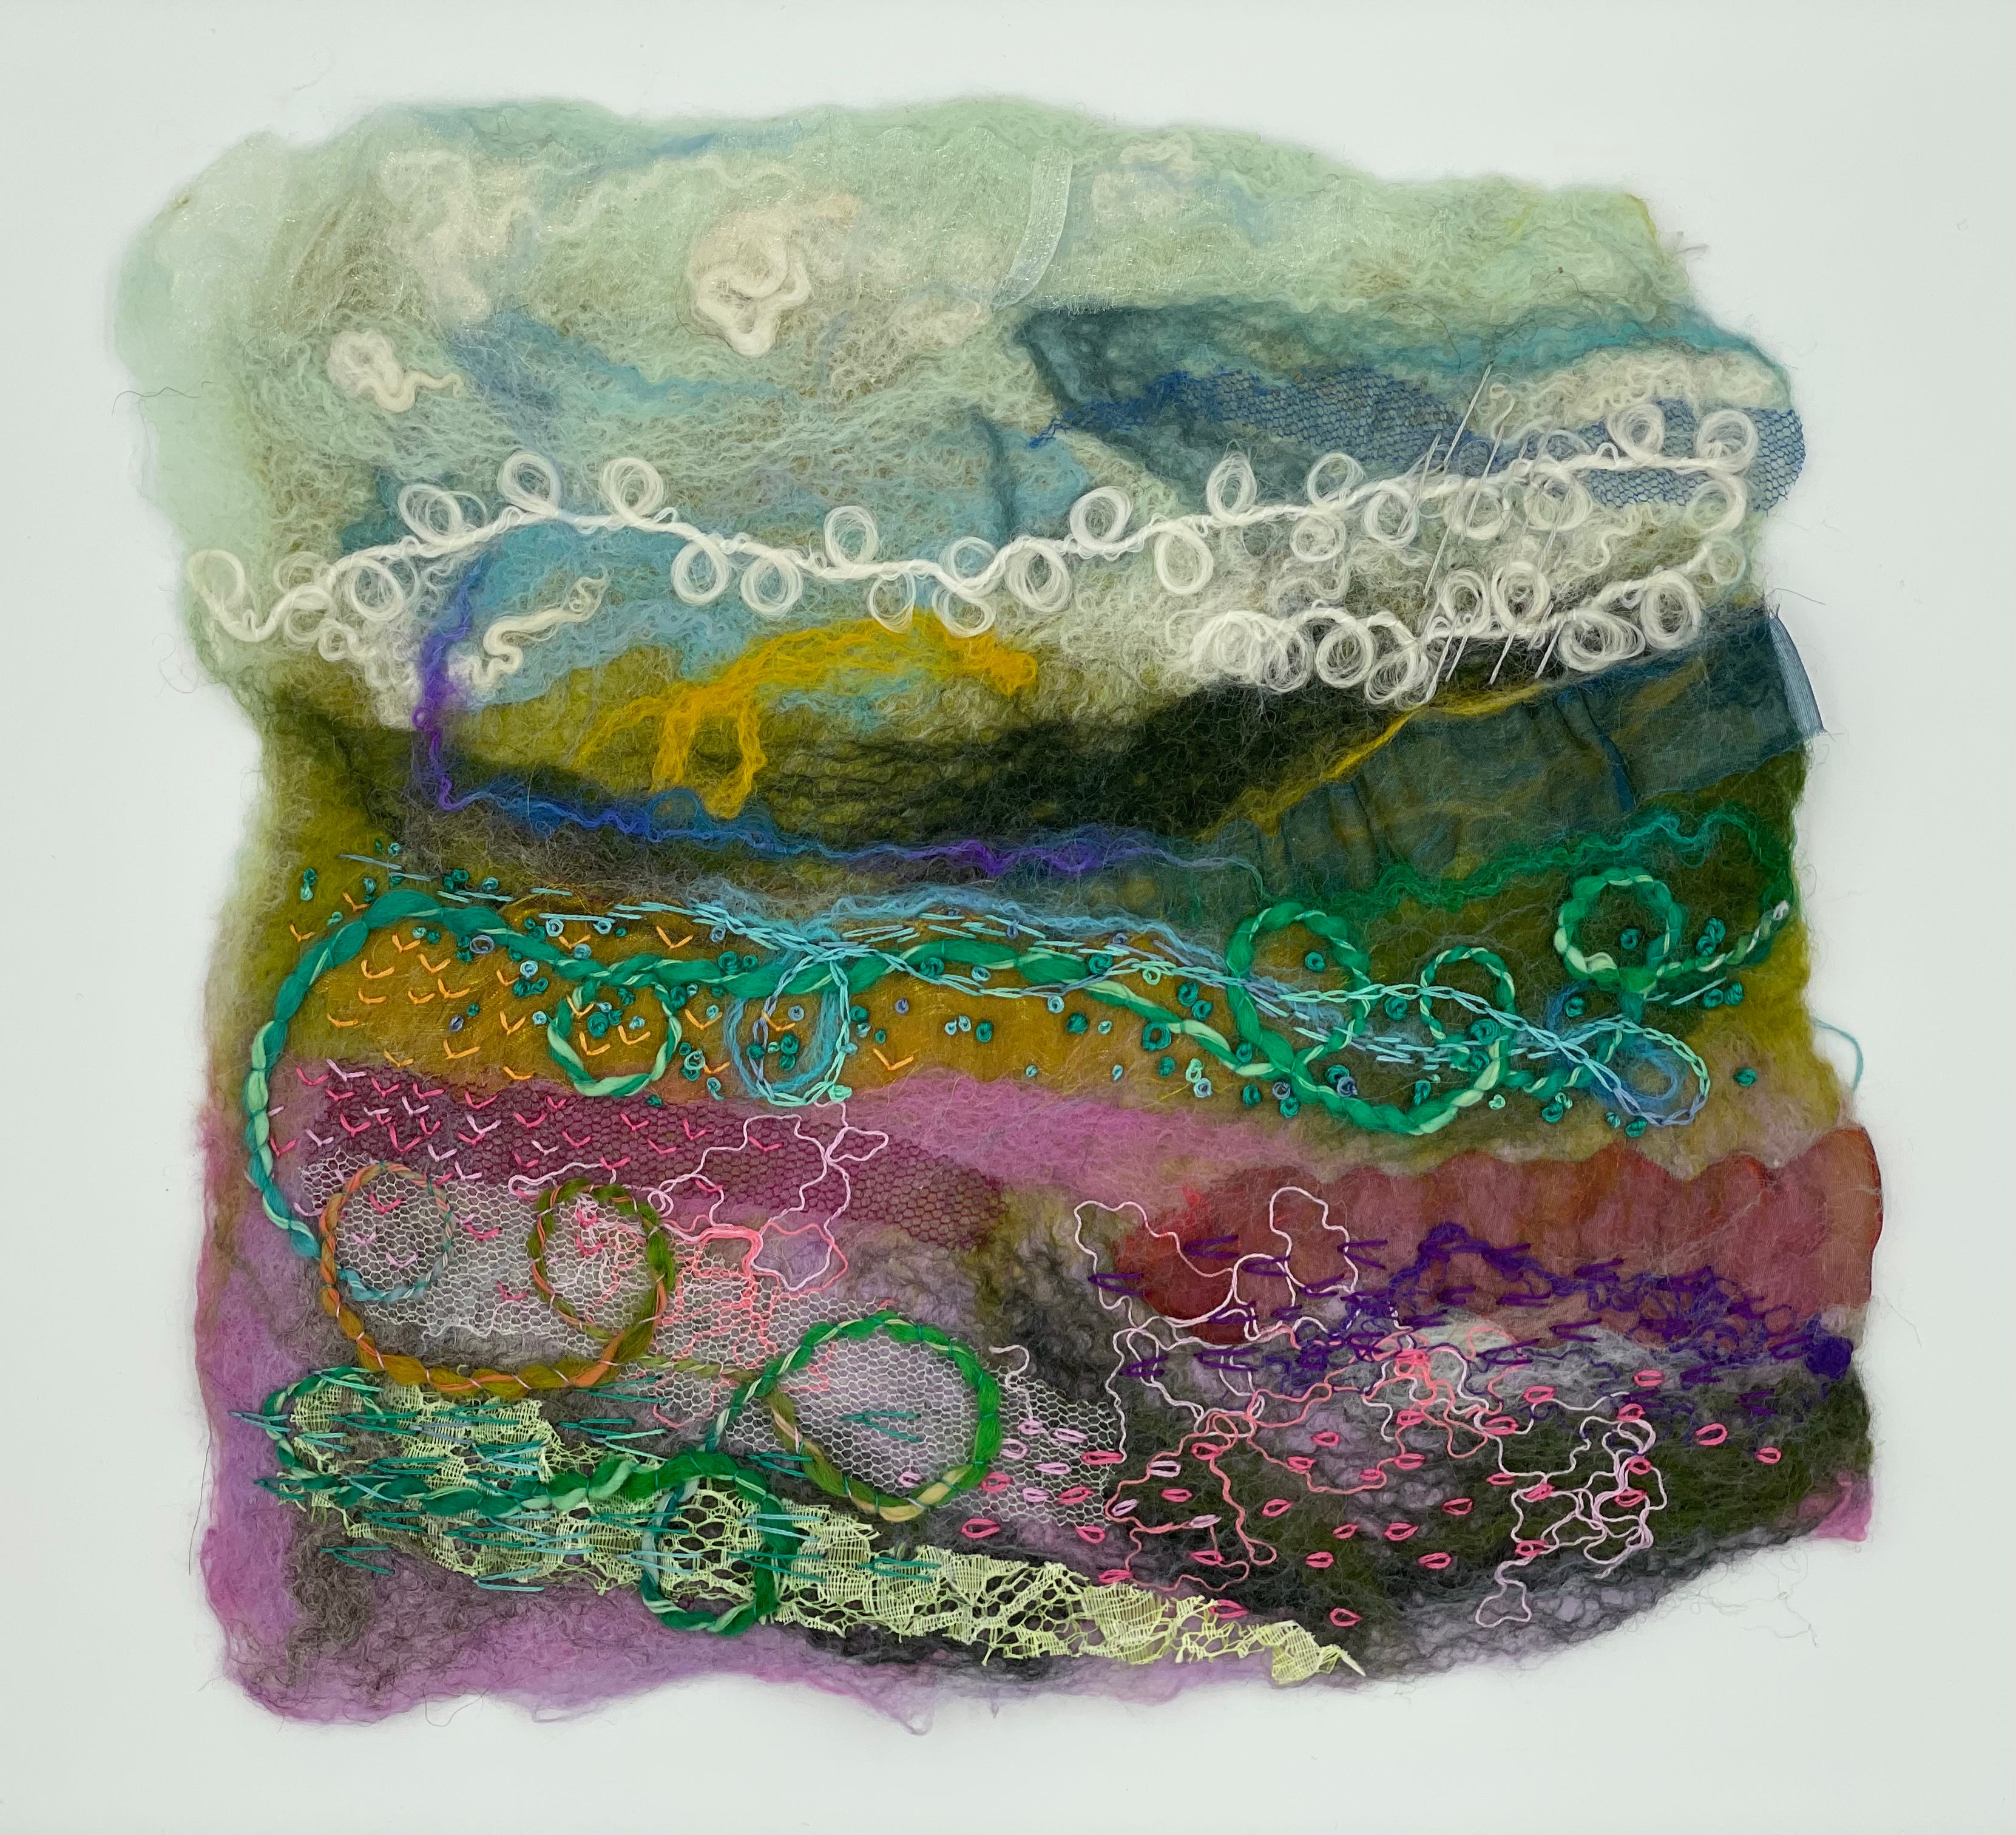
The artwork above, Spring Has Sprung, is a good example of how synthetic nets, organza’s and a piece of floral lace have been embedded into the surface of the felt during the wet felting process. Additional threads and yarns have also been used to develop surface texture and detail. This has created depth in the work, with many layers of texture and colour, which are further developed with hand stitching for mark-making, and then couching with a multicoloured yarn and hand stitched embroidery, adding to the whimsical sense of movement within the piece.
Below is a selection of the works I created in recent months for an exhibition in Felixstowe. I have used the techniques described here to develop these pieces. What felt most significant with this body of work was the desire to evoke a more illustrated, emotive quality. I wanted the viewer to feel a stronger connection to the work—as if they could feel captivated withing the scene, a captured moment in time, feel the openness of the landscape depicted, and hear the birds song and smell the salt in the air. These are the things that return to me when I look back through my sketchbook pages.


If you enjoyed part one of this two-part tutorial, I hope you’ll find part two just as inspiring. In this video, I share how I use hand embroidery as mark-making on the surface of the felt, and how I like to use stitch to create patterns and textures. I also share examples of the stitches I’ve used in my work, along with step by step guidance on how to create them.
I hope you have enjoyed this post about hand embroidery and feel inspired to experiment with your own embroidery techniques or explore a new idea. I’d love to hear your thoughts and ideas in the comments below!
Thank you for following along. If you have enjoyed this post or know someone who would appreciate it, please consider sharing and subscribing for future email notifications.
See you next time,
Sarah x